Datapoint monitor dp_monitor.pnl
The datapoint monitor is a universal test panel and can be of great use when creating dynamic displays and device symbols. The purpose is to show all values of all datapoint elements of a datapoint clearly as well as to be able to change the values.
The datapoint monitor is located in:
vision/dp_monitor.pnl
To use the datapoint monitor, open the panel and set two $ parameters "$b_editable" and "$dp":
Open the datapoint monitor , for example, with the aid of the graphic editor.
-
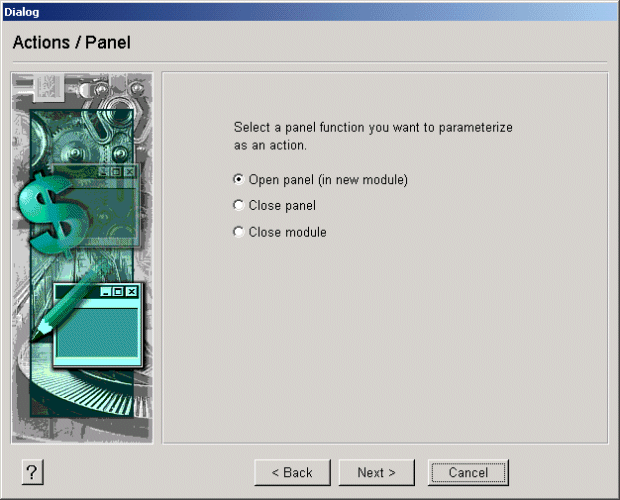
On the "Events" tab click, for example, on the event "RightMousePressed". The "Actions" panel is opened:
-
Choose the "Open panel (in new module)" option and click on Next.

-
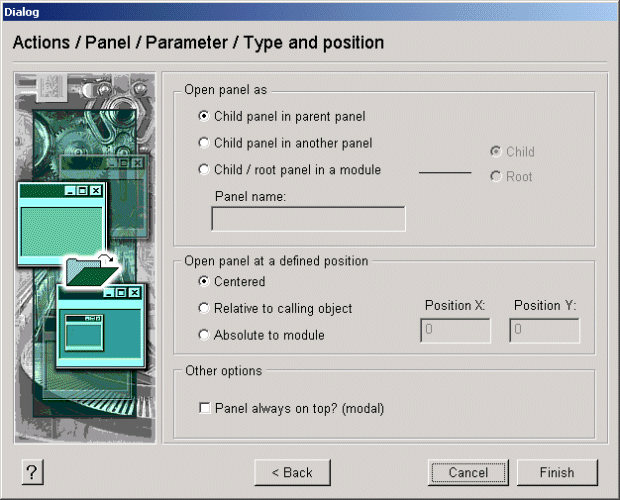
Set the value of the "editable" dollar parameter to 1. This means that values can be changed. Select the name of the datapoint that should be shown (for example, _mp_PUMP1), and click on Next.
-
Choose the "Child panel in parent panel" option and click on Finish.
-
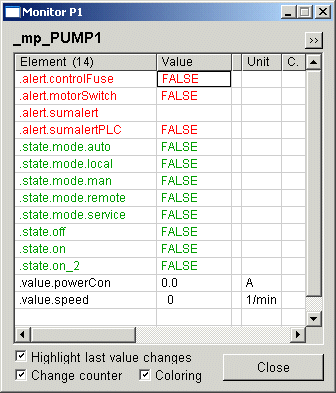
Open the panel, for example, using Quick view (click on the Save and run button). Right click on the panel. The datapoint monitor is opened and shows all elements of the _mp_PUMP1 datapoint.
-
Click on the >> button. Further information on the datapoint elements is shown:
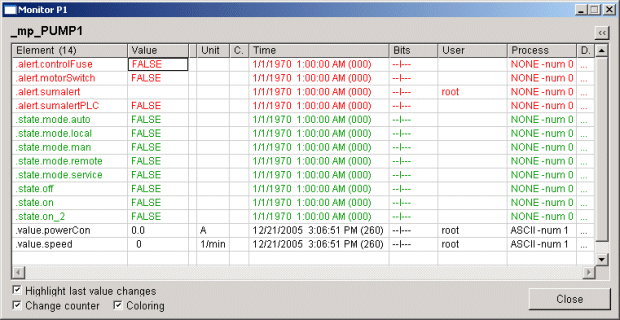
If the check box "Highlight last value changes" is activated, the row with the last value change is highlighted using bold type. The change before the last change is shown bold and italicize. If there are several elements with the same source time, all relevant rows are shown with the same color.
The dollar parameters, which are required for the use of the datapoint monitor, can also be set using a control script as follows:
 main()
{
  string dp = "P1"; // or dp = $dp, etc.
  ChildPanelOnRelativ("vision/dp_monitor.pnl","Monitor: "+dp,
  makeDynString("$dp:"+dp,"$b_editable:"+TRUE),20,-70);
}