
Use Cases - Migration from InfluxDB® to PostgreSQL® / MS SQL®
If you use an InfluxDB® backend and want to replace your archiving database with PostgreSQL® or MS SQL®, you need to migrate your existing archive data to PostgreSQL® / MS SQL®. For this purpose, you can use the Backend to NGA Importer functionality.
Switch from an InfluxDB® to a new managed PostgreSQL®
If you have installed the managed version of the PostgreSQL® (see chapter PostgreSQL® Database Overview) with the install wizard of WinCC OA 3.20, then proceed as follows.
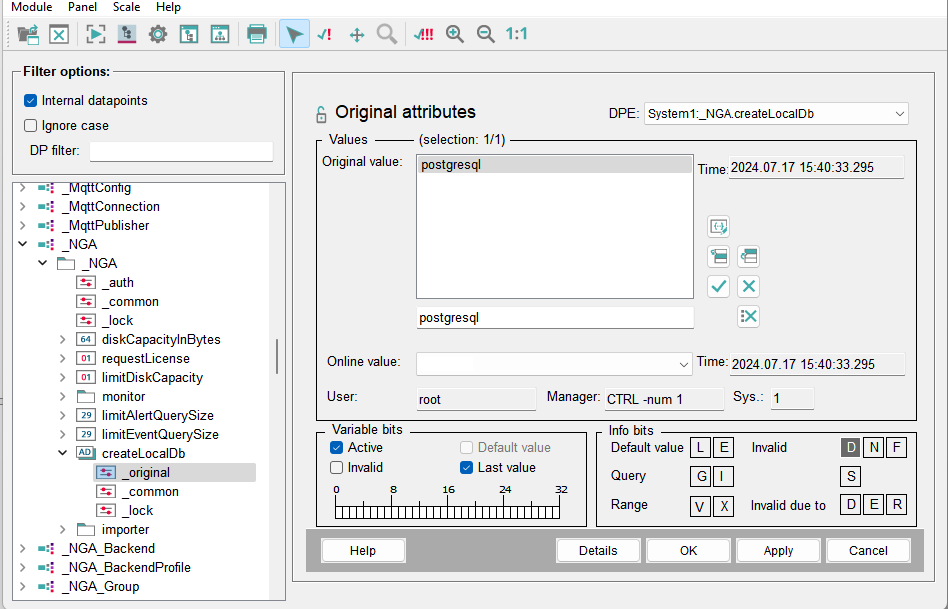
- In your project, open the PARA module, check the
Internal datapoint checkbox. Open the internal
datapoint _NGA and the data point element
createLocalDb. Change the original value to
postgresql and click on Apply
and OK:
- Proceed with the step Set the PostgreSQL® to Read&Write Database
Migration from an InfluxDB® to a remote or manually installed PostgreSQL® or MS SQL®
If you have installed PostgreSQL® or MS SQL manually - see chapters PostgreSQL® Server Installation and MS SQL® Server Installation, then proceed as follows to migrate data from an InfluxDB® to a remote or manually installed PostgreSQL® or MS SQL®.
Proceed with the step Set the PostgreSQL® to Read&Write Database.
Migration from InfluxDB® to PostgreSQL®
Set the PostgreSQL® to Read&Write Database
- Open the NGA Database Engineering via and set the PostgreSQL® to Read&Write database:
Figure 1. Set the PostgreSQL® to Read&Write database 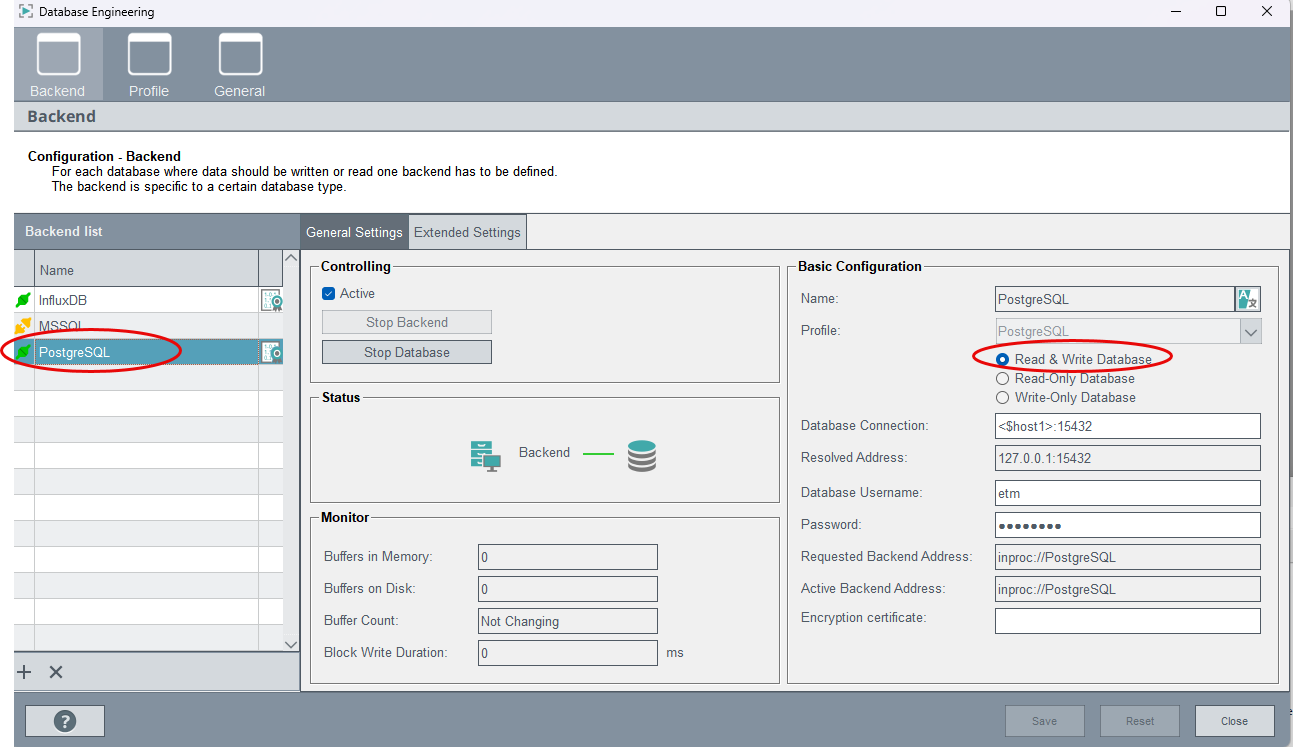
Group settings - changing the backend, creating new groups
- Open the NGA Runtime Engineering via and switch the backend from InfluxDB® to PostgreSQL® for the
existing groups that archive to InfluxDB®. This means at least the groups EVENT
and ALERT or more groups if you use several groups:
Figure 2. Switch the backend to PostgreSQL® 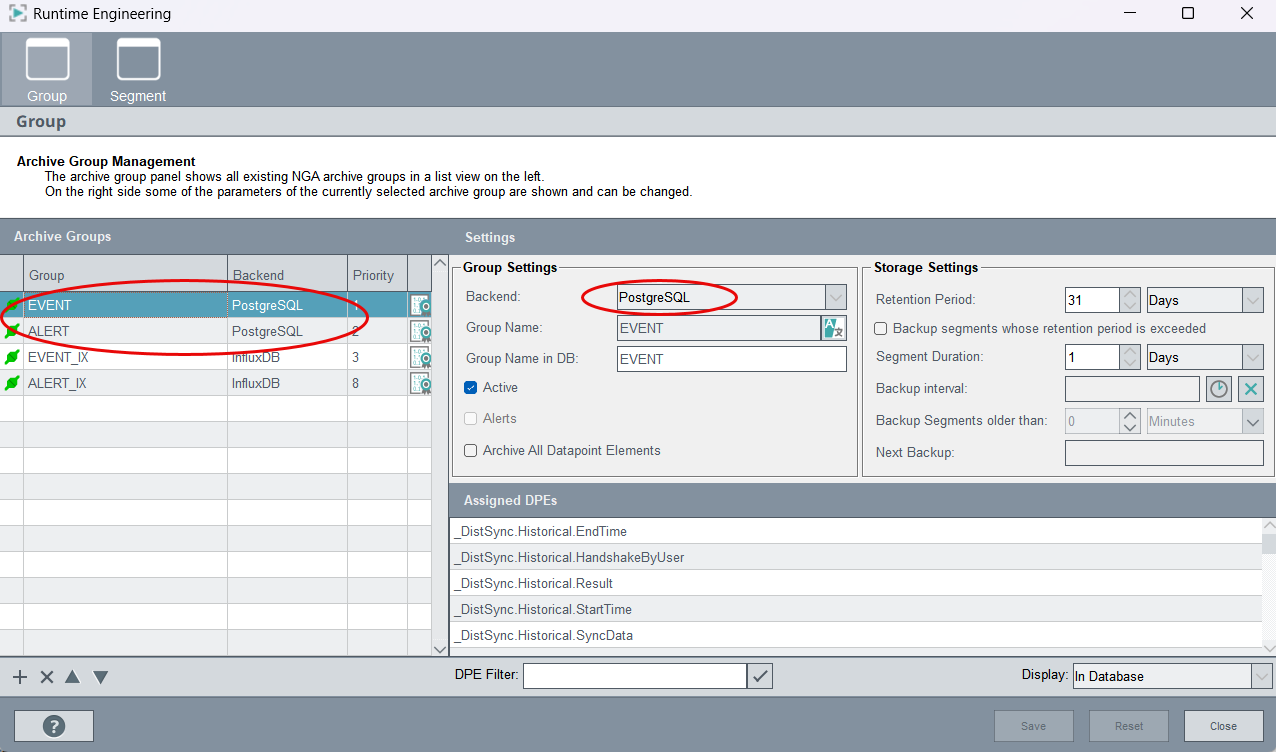
- Open the NGA Database Engineering via and change your InfluxDB® backend to be a read-only backend:
Figure 3. Set the InfluxDB® backend to read-only 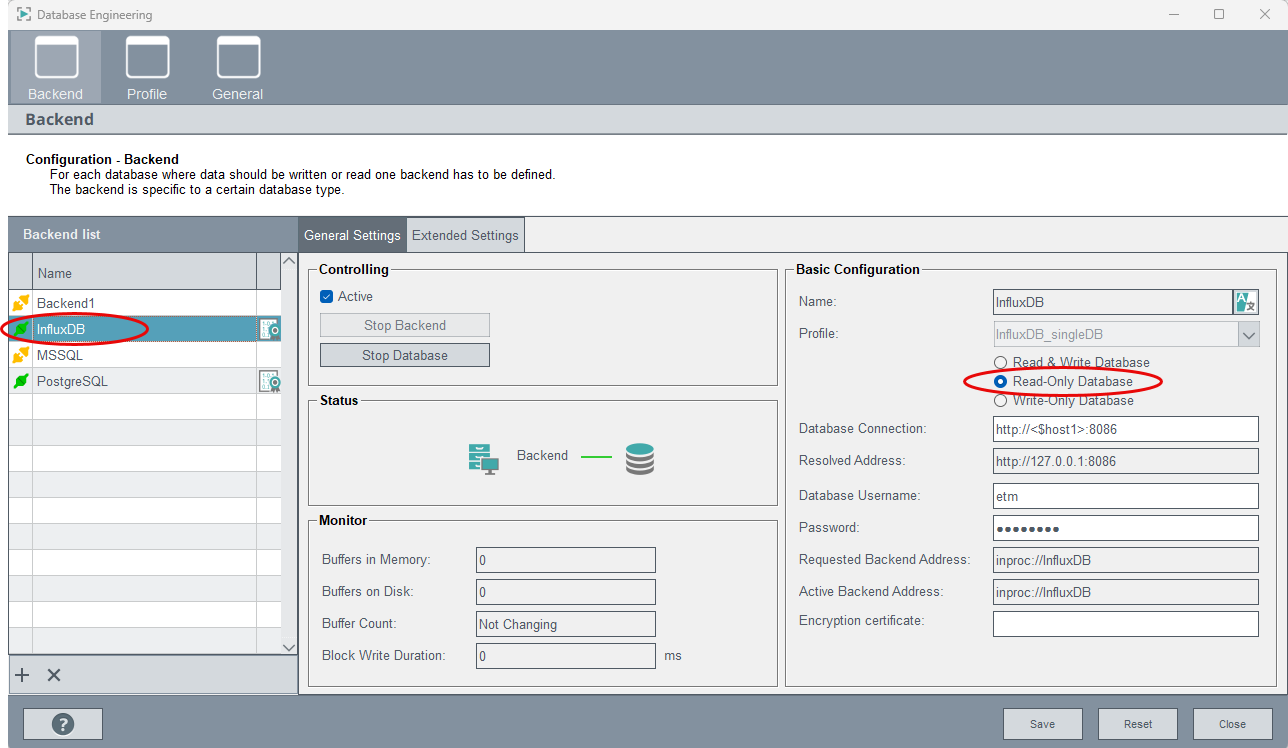
-
For each archive group that you have changed to PostgreSQL®, add an archive group with the same settings for Alerts and Storage settings. Select InfluxDB® as the Backend setting and click Save.
Then set the Group Name in DB of the newly created auxiliary group to match the Group Name in DB of the corresponding original group and click Save again.
For the alert group, check the check box for Alerts in the group settings:Figure 4. Check the Alerts checkbox 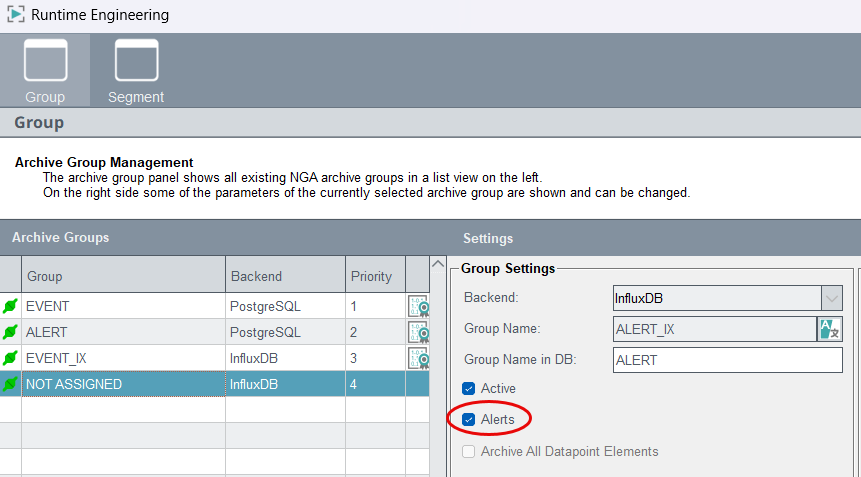
Below, the name EVENT of the original EVENT group is used for the new group:
Figure 5. Set the Group Name in DB 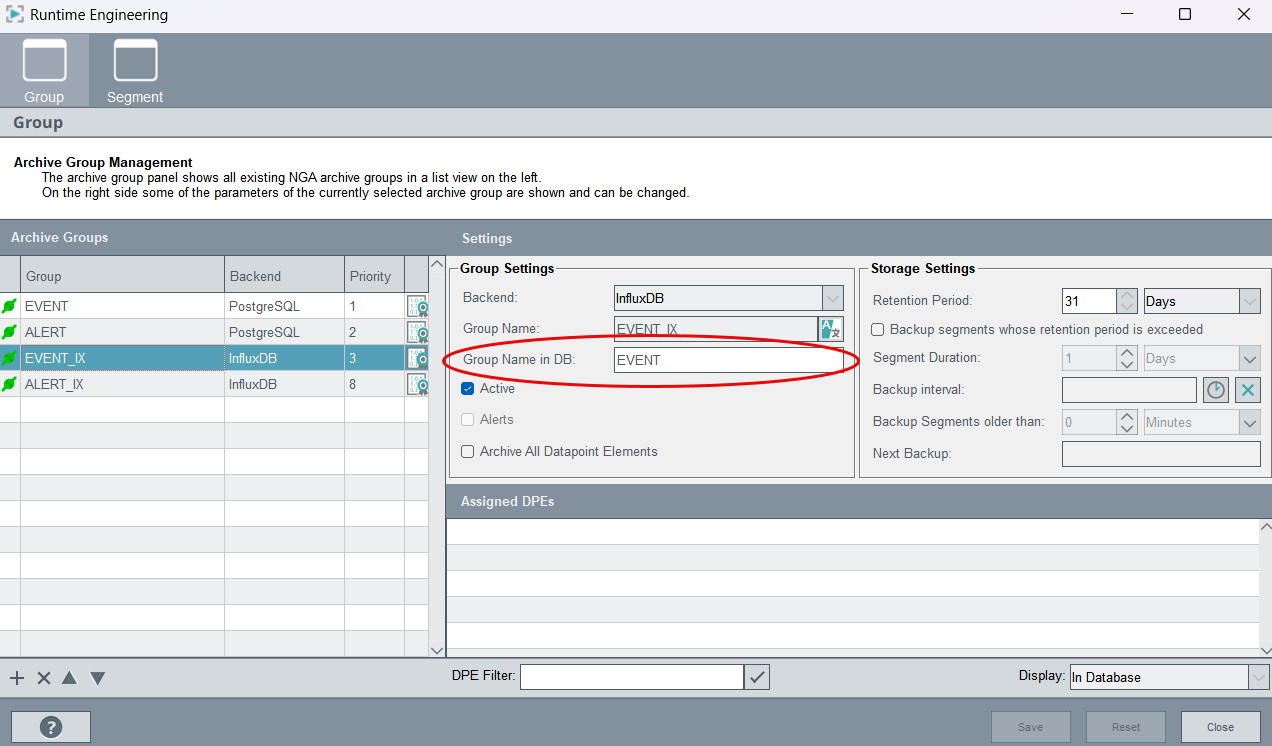
Importer settings - Create a new importer, set the read-only InfluxDB® backend for the importer
- Open the NGA Importer configuration via and click on the
 plus sign under the Importer table on the
left-hand side of the window. Enter a name and select
NextGenArchiver for the Type of
reader:
plus sign under the Importer table on the
left-hand side of the window. Enter a name and select
NextGenArchiver for the Type of
reader:
Figure 6. Add a new importer 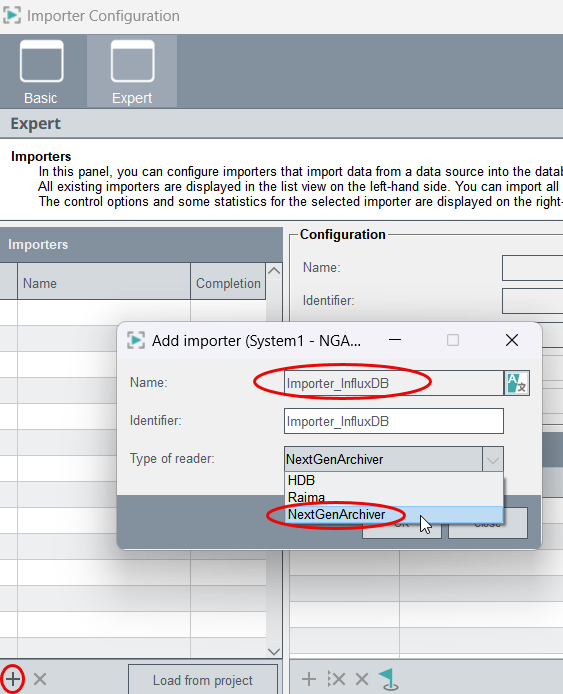
- Select the InfluxDB® backend for the new importer you created by selecting the
importer from the table, clicking on the
backendDpName in the Importer-specific
configuration and by selecting the
_NGA_B_InfluxDB datapoint:
Figure 7. Select the read-only backend 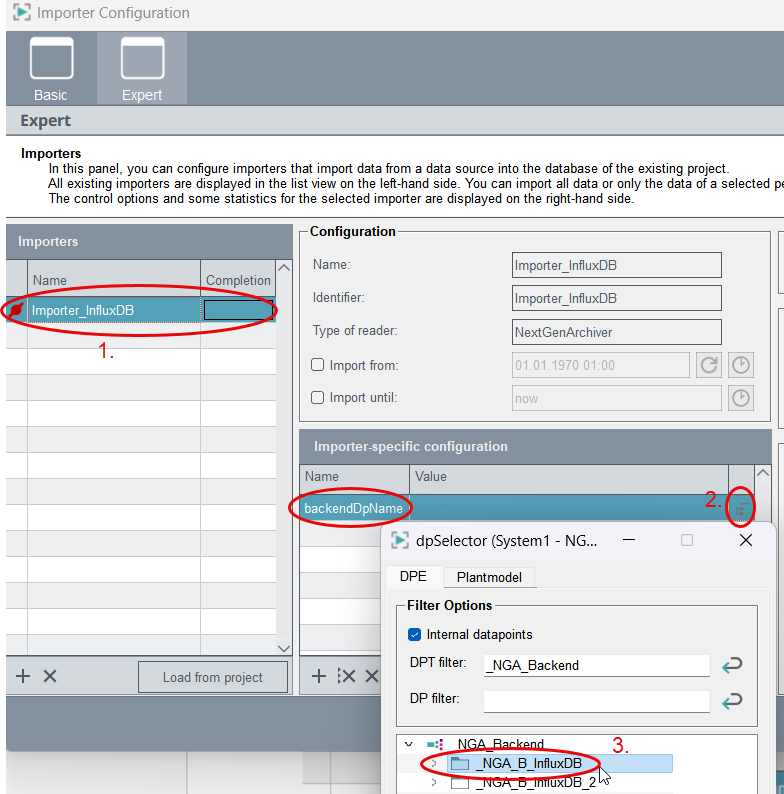
Select the start time for the import and start the import
- Open the NGA Importer via and check the Import from checkbox and
select the start time for the data import.
Note:The time must be the time of the oldest segment in the InfluxDB®. To check the oldest segment, open the NGA Runtime Engineering via and the Segment tab. On the right you can see the segments and check the oldest segment:
Figure 8. Check the oldest segment 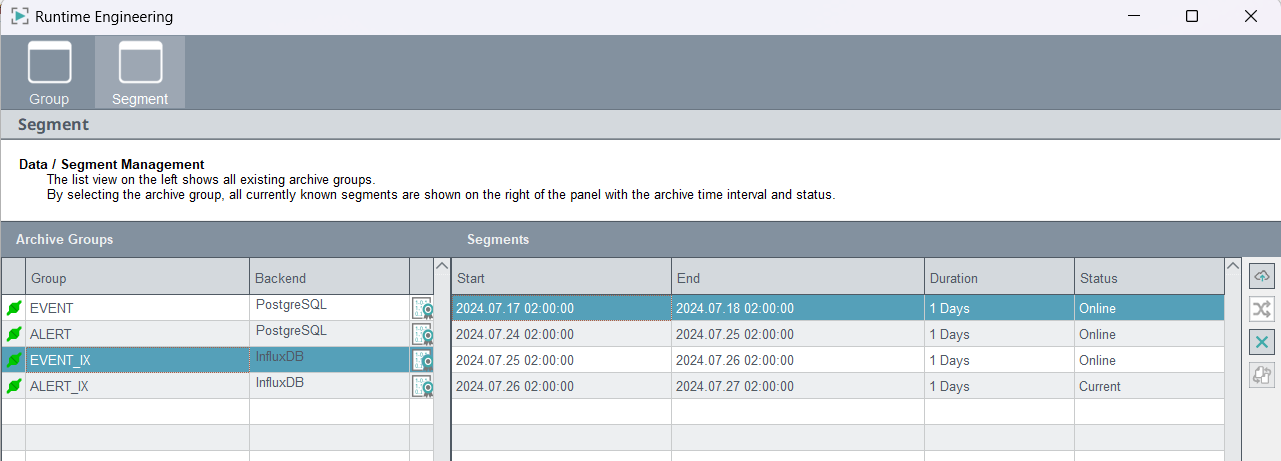
- Start the import via the NGA Importer.

